
Mastering Battleplan Zone Orders: The Ultimate WWII RTS Command Guide
Learn how to master Battleplan zone orders, manage supply lines, and execute multi-stage WWII RTS offensives like a seasoned general.
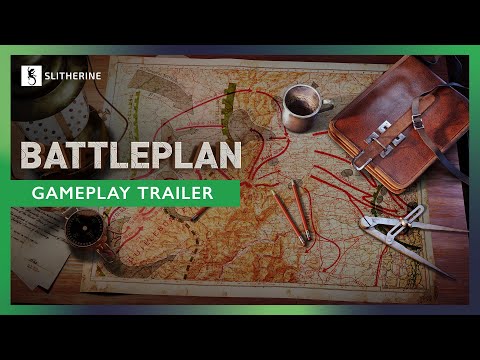 Official mediaLearn how to master Battleplan zone orders, manage supply lines, and execute multi-stage WWII RTS offensives like a seasoned general.YouTube
 Strategic wargaming has evolved beyond moving a single squad or tank across a static grid. When you dive into the innovative World War II real-time strategy game developed by Foolish Mortals and published by Slitherine, understanding Battleplan zone orders becomes the single most important skill for achieving total victory. Mastering Battleplan zone orders allows you to designate specific areas of operation, coordinate complex multi-stage offensives, and dynamically shift your forces across the map with intuitive drag-and-drop mechanics.
Whether you are participating in community-driven historical scenarios or designing customized armies from scratch, commanding at depth requires more than sheer numbers. Victory on the European theater fronts belongs to tacticians who look beyond the next hill, manage their logistical lifelines, and orchestrate seamless breakthroughs.
The Evolution of Command: Understanding Battleplan Zone Orders
The introduction of the Zone Orders system represents one of the most significant updates following the massive success of the Steam Next Fest demo. Community reports indicate that players demanded a more fluid way to handle large-scale operations without getting bogged down in micromanagement.
The new zone system addresses this by letting you designate distinct operational boundaries for your units. By utilizing the Regimental plan order and drawing directly on the map, the zone system largely automates troop coordination. You can easily transfer units between zones using a clean drag-and-drop interface, minimizing interface friction while maintaining precise control over your front lines.
| Feature / System | Manual Planning Mode | Readiness Planning Mode | Zone Orders System |
|---|---|---|---|
| Execution Frequency | Restricted to a single phase per day | Flexible planning throughout the entire day | Automatic coordination via map-drawn regions |
| Readiness Penalty | Immediate execution available | Requires waiting for 100% readiness to avoid penalties | Streamlines troop transfers via drag-and-drop |
| Strategic Focus | Hardcore, rigid micro-management | Forgiving, forward-thinking multi-step staging | Broad area-of-operation management |
When setting up a new campaign, players encounter different planning modes. Choosing the Readiness mode provides a more forgiving experience, allowing you to create new plans continuously throughout the day at the cost of waiting for plans to reach 100% readiness. Coupled with Battleplan zone orders, this mode empowers you to command armies deliberately and effectively.
Supply Lines and Logistical Management
An army marches on its stomach, and in this WWII RTS, your heavy armored divisions and artillery batteries burn through supplies at an alarming rate. Even large-scale campaign maps typically restrict you to four active supply points at any given time.
As your spearheads push deeper into enemy territory, managing these logistical hubs is vital. If your combat formations run out of supplies—signaled by flashing yellow text—their combat effectiveness and morale plummet.
| Supply Action | Real-Time Impact | Best Practice |
|---|---|---|
| Hub Deconstruction | Takes several minutes of real-time operation | Only tear down rear-guard hubs once forward towns are secured |
| Hub Construction | Leaves units temporarily vulnerable | Place new supply points directly behind armored spearheads |
| Unit Resupply | Restores morale and combat readiness | Utilize the special resupply order on active supply nodes |
| Air Recon Rebasing | Prevents aircraft grounding and supply starvation | Rebase air squadrons alongside advancing frontline hubs |
Player experience highlights a common pitfall: forgetting to rebase air squadrons when moving their supporting supply points. Deconstructing and rebuilding supply hubs takes several minutes of real-time gameplay. Always maintain multiple operational supply points along the front to ensure your infantry, tanks, and close support aircraft remain fully combat-effective.
Executing Multi-Stage Offensives and Breakthroughs
Achieving a breakthrough against fortified enemy lines requires careful synchronization between infantry pinning forces and armored spearheads. A successful multi-stage offensive typically follows a structured sequence of operational phases.
Phase 1: Scouting and Softening Defenses
Before launching any major assault, deploy air recon squads and infantry scouts. Uncovering enemy positions marks them with binoculars on the tactical map, which reduces their morale and defense values. Furthermore, scouting data drastically improves the accuracy and damage output of subsequent artillery barrages, while exposing enemy supply hubs for future capture or cut-off.
Phase 2: Pinning and Defensive Posturing
Assign counterattack orders to your infantry formations along the contact line. Although using a counterattack order defensively might feel counterintuitive, it pins enemy units in place, drains their supplies, and prevents them from responding when your primary offensive hits.
Phase 3: Armored Breakthrough and Encirclement
Once the enemy front line is softened and fixed in place, unleash your armored division using a breakthrough order. Tanks move rapidly through enemy lines, allowing you to fold enemy flanks inward. Follow closely behind the armor with infantry units executing seize ground orders to mop up remaining pockets of resistance.
| Order Type | Color Code | Primary Gameplay Function |
|---|---|---|
| Defensive Orders | Blue | Hold lines, counterattack, and pin enemy formations |
| Offensive Orders | Red | Execute breakthroughs, seize ground, and push deep into enemy territory |
| Specialist Orders | Gray | Conduct reconnaissance, clear minefields, and deliver artillery barrages |
Customization, Difficulty Scaling, and Historical Units
Beyond battlefield tactics, the game features a deep management meta-game. Through the army builder, commanders can fine-tune existing formations, hire and level up officers, assign specialized officer traits, and customize individual unit patches and designations.
| Customization Aspect | Description | Gameplay Benefit |
|---|---|---|
| Officer Management | Hire, level up, and assign traits to leaders | Boosts divisional efficiency and combat bonuses |
| Historical Units Option | Bypasses manual army building for quick deployment | Lets players jump straight into historical scenarios |
| Difficulty Scaling | Adjustable settings for casual or hardcore play | Caters to both newcomers and seasoned wargamers |
| UI Scaling & 3D Icons | Visual improvements for unit legibility | Solves icon-recognition hurdles during fast battles |
If you prefer to bypass administrative duties and jump straight into historical engagements, you can select the "Use Historical Units" option. For more details on game updates, community events, and digital wargaming publishing, visit the official Slitherine website.
Frequently Asked Questions
What are Battleplan zone orders used for?
Battleplan zone orders allow players to designate specific areas of operation for their military units and seamlessly transfer troops between zones using a convenient drag-and-drop map interface.
How do I prevent my units from running out of supplies?
You must carefully manage your four available supply points, deconstructing and rebuilding them closer to the front lines as your army advances. Always ensure your frontline combat formations and rebased aircraft remain within active supply range.
What is the difference between Readiness mode and Planning phase mode?
Planning phase mode restricts you to a single planning phase per day, whereas Readiness mode permits continuous order creation throughout the day at the cost of waiting for plans to reach 100% readiness to avoid execution penalties.
Can I skip army management and jump straight into combat?
Yes. By selecting the "Use Historical Units" option at the start of a campaign or mission, you can completely bypass custom army building and officer management to engage in immediate tactical gameplay.
Related guides
Battleplan How to Draw Attack Plans: Master WWII RTS Strategy & Tactics
Learn battleplan how to draw attack plans in deep tactical RTS games. Master supply lines, offensive vectors, and military orders like a pro.
Mastering Battleplan Defense in Depth: A Comprehensive Tactical Guide
Learn how to dominate the battlefield in the new WWII RTS. Master the Battleplan defense in depth strategy, manage your logistics, and command divisions to victory.
Mastering the Battleplan Complex Attack: Tactical Strategies for Harus
Learn how to execute a winning Battleplan complex attack in Harus. Optimize your unit composition, pathing, and defensive maneuvers to dominate.
Mastering the Battleplan Encirclement Tactic: A Complete WWII RTS Guide
Learn how to execute a successful Battleplan encirclement in Foolish Mortals Games' new WWII RTS. Dominate logistics, map drawing, and strategy today.