
Mastering the Battleplan Encirclement Tactic: A Complete WWII RTS Guide
Learn how to execute a successful Battleplan encirclement in Foolish Mortals Games' new WWII RTS. Dominate logistics, map drawing, and strategy today.
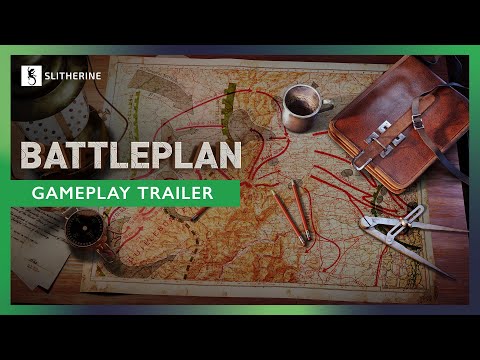 Official mediaLearn how to execute a successful Battleplan encirclement in Foolish Mortals Games' new WWII RTS. Dominate logistics, map drawing, and strategy today.YouTube
 Mastering the mechanics of a complex military simulation can feel overwhelming, especially when executing a high-level Battleplan encirclement maneuver. When diving into Foolish Mortals Games' realistic World War II real-time strategy title, available now on Steam, understanding how to trap enemy forces is the key to victory. Pulling off a devastating Battleplan encirclement requires careful synchronization of infantry divisions, armored spearheads, air support, and rigid logistical supply lines across massive historical battlefields.
Understanding the Planning Phase and Readiness Mode
Before your divisions can execute grand sweeping movements, you must master the game's unique time and order system. Playing with Readiness Mode enabled is vital for beginners and veterans alike. While the standard Planning Phase restricts your order updates to a single daily window, Readiness Mode lets you draft plans around the clock.
| Planning System | Flexibility | Execution Penalty | Best Suited For |
|---|---|---|---|
| Standard Phase | Low (Once per day) | None at execution | Rigid, historical simulations |
| Readiness Mode | High (Continuous drafting) | Low readiness penalties if rushed | Flexible, adaptive strategies |
Community reports indicate that waiting for plans to reach 100% readiness is critical to avoiding severe combat penalties. As you draw operations directly onto the topographical map, remember that your officers require time to process and prepare these commands before the battle simulation ticks forward second by second.
Logistics: The Lifeline of Every Operation
An army marches on its stomach, and in this simulation, fuel and ammunition dictate whether your spearhead succeeds or stalls. Big maps and intense missions typically grant you just four active supply points.
| Supply Hub State | Action Required | Real-Time Impact |
|---|---|---|
| Active Hub | Maintain proximity to front | Supplies units, preserves morale |
| Deconstruction | Click trash icon to remove | Takes several minutes of real time |
| Relocation | Place near armored units | Fuels fast tank breakthroughs |
Player experience highlights a common pitfall: forgetting to rebase air squadrons or relocate supply depots as armored divisions race deep into enemy territory. If your tanks outrun your supply network, their combat effectiveness plummets instantly.
Step-by-Step Guide to Executing an Encirclement
Executing a multi-stage trap requires precise coordination between static infantry lines and mobile tank units. Here is how to orchestrate a textbook encirclement phase by phase:
| Phase | Assigned Units | Primary Order Type | Objective |
|---|---|---|---|
| Phase 1 | Air Scouts & Recon | Aerial Recon / Scouting | Uncover enemy positions and supply hubs |
| Phase 2 | Infantry Divisions | Counterattack / Seize Ground | Pin enemy forces in place and drain morale |
| Phase 3 | Armored Division | Breakthrough | Smash through weak points and race to the rear |
| Phase 4 | Engineers & Artillery | Mine Clearing & Barrage | Soften fortifications and secure paths |
Pinning the Enemy Center
Begin by issuing counterattack or seize ground orders to your infantry formations along the contact line. Although a counterattack order sounds defensive, its real purpose is to lock enemy divisions into active combat, preventing them from shifting forces to face your upcoming armored assault.
Unleashing the Armored Spearhead
Once the enemy center is pinned, activate your breakthrough order for your tank divisions. Tanks move at high speeds through enemy lines, making it easy to slice straight toward coastal objectives or deep rear-zone villages. Use close support aircraft to clear the path and track your armor's exact route using the top-left strategic overlays.
Closing the Pocket
When your armored spearhead reaches the rear or coastline, redirect your forces to fold the enemy flanks inward. Cutting off enemy supply hubs destroys their defenses and forces widespread surrenders as white flags begin to wave across the map.
Managing Chain of Command and Army Customization
For players who prefer tailored forces over historical setups, the game features a deep management system. You can build custom armies down to individual unit patches and officer traits.
| Management Feature | Customization Level | Gameplay Effect |
|---|---|---|
| Officer Traits | High | Grants unique combat bonuses and quirks |
| Unit Composition | Granular (Corps to Company) | Alters division speed and firepower |
| Historical Defaults | Instant Setup | Bypasses prep for immediate combat |
Keeping your officers alive throughout lengthy campaigns allows them to gain valuable veterancy, turning average divisions into elite fighting forces capable of executing complex orders flawlessly.
Frequently Asked Questions
What does a Battleplan encirclement achieve?
Surrounding enemy units and cutting them off from supply points degrades their combat effectiveness, lowers their morale, and dramatically increases the likelihood of enemy surrender.
How do I prevent my units from running out of supplies?
Manage your four active supply hubs carefully. Deconstruct and rebuild them closer to the frontline as your armies advance, and remember to rebase air squadrons whenever their support hubs are moved.
Why are my orders taking so long to execute?
When playing in Readiness Mode, executing orders before they reach 100% readiness incurs heavy penalties. Always plan your next two operational steps in advance while current orders are running.
Related guides
Battleplan How to Draw Attack Plans: Master WWII RTS Strategy & Tactics
Learn battleplan how to draw attack plans in deep tactical RTS games. Master supply lines, offensive vectors, and military orders like a pro.
Mastering Battleplan Defense in Depth: A Comprehensive Tactical Guide
Learn how to dominate the battlefield in the new WWII RTS. Master the Battleplan defense in depth strategy, manage your logistics, and command divisions to victory.
Mastering Battleplan Zone Orders: The Ultimate WWII RTS Command Guide
Learn how to master Battleplan zone orders, manage supply lines, and execute multi-stage WWII RTS offensives like a seasoned general.
Mastering the Battleplan Complex Attack: Tactical Strategies for Harus
Learn how to execute a winning Battleplan complex attack in Harus. Optimize your unit composition, pathing, and defensive maneuvers to dominate.